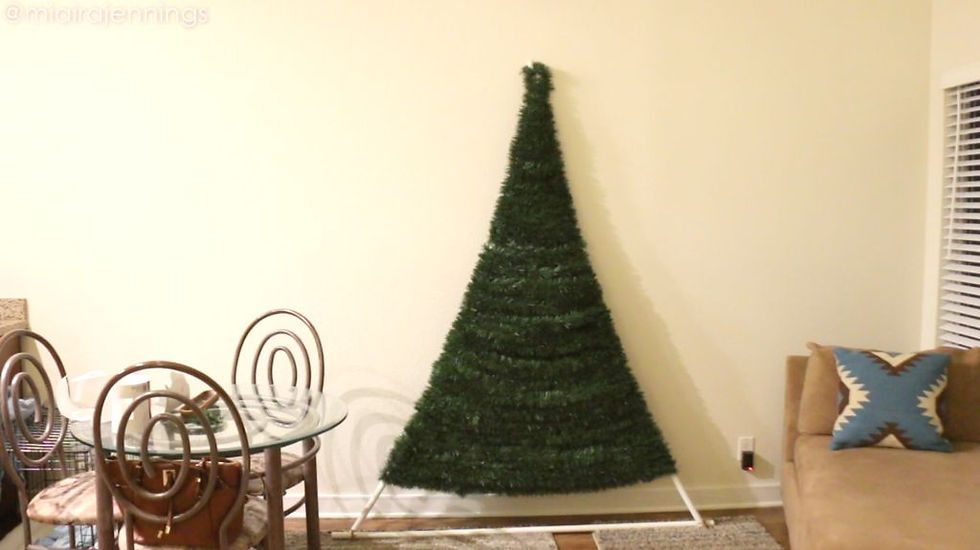
DIY Space-Saving PVC Pipe Christmas Tree
- Miaira Jennings

- Nov 22, 2019
- 2 min read
If you live in an apartment like I do, a traditional Christmas tree will probably take up more space in your home than you'd like. Here's how to make a DIY Christmas tree out of PVC pipes that will save you space AND money this holiday season!
Full video tutorial:https://www.youtube.com/watch?v=4kUcZJg1KiA

Materials
What you'll need:
Three 3/4-inch PVC pipes (I started with 7ft long pipes, but cut the bottom shorter)
PVC pipe cutter (if you plan to trim your own pipes)
Twine or rope
Garland (I used 6 packs of 50ft garland)
Lights
Ornaments
Star or Angel

Step 1: Create Triangle
Start by assembling your pipes on the floor to create an isosceles triangle shape, so the two longer sides will be equal and the bottom pipe will be shorter. This will create a tall tree look.
You can either ask an attendant in your local home improvement store to cut the pipes for you before you head home, or you can use a PVC pipe cutter to trim them yourself.

Step 2: Tie Pipes Together
Overlap the ends of the pipes and use your twine or rope to tie them together tightly. You want to be sure to wrap the twine around each end enough times so the pipes do not separate and the triangle stays nice and sturdy.


Step 3: Lay Against Wall
Lay the tree against the wall. Be sure to pull the base out away from the wall enough so that the top of the tree can rest against the wall to prevent any wobbling or chance of falling over.

Step 4: Add Garland
Now it's time to really make it look a tree by adding garland! Start from the top and wrap the garland around the entire base horizontally. Wrap it tight enough so that there are no gaps and the white pipes are completely covered, but not too tight so you don't pull the pipes in too much.


Step 6: Add Lights
It's time to light it up! Plug your lights in and starting from the bottom, add lights to the front of the tree by intertwining them with the garland so they stay in place. Once you get to the top portion, you can start to wrap the lights around the tree for extra stability.


Step 6: Add Ornaments
Dress your tree up with some beautiful ornaments and decorations! I actually got mine from the 99cent store, which was a huge win.


Step 7: Add Star or Angel
Finish your tree off with the final touch — a star or angel on top! The base of the star I used ended up fitting perfectly onto the 3/4-inch PVC pipe. If you'd like, you can add a wall sticky or strap to the top of the tree to secure it to the wall.


All done!
That's all it takes to create your very own space-saving, budget-friendly Christmas tree that will impress your holiday guests. Plus, it's super easy to take down after the holidays. To make it even more festive, add a half-circle tree skirt and some gifts, of course. Thanks for checking out this tutorial!
Instagram: https://www.instagram.com/miairajennings/ YouTube: https://www.youtube.com/miairajenningstv Website: http://miairajennings.com Pinterest: https://www.pinterest.com/miairajennings/ Business Inquiries: MGJmedia@gmail.com Shop my Amazon store: https://www.amazon.com/shop/miairajenningstv


Comments